Introduction
In the fast-paced digital age, the ability to print wirelessly has become an essential feature in our homes and offices. Canon, a renowned name in the world of printers, offers a range of models equipped with WiFi connectivity. If you’re wondering How to Connect My Canon Printer to WiFi, you’re in the right place. This comprehensive guide will walk you through the process step by step, ensuring that you can harness the power of wireless printing with ease and confidence.
Step 1: Unboxing and Preparing Your Canon Printer
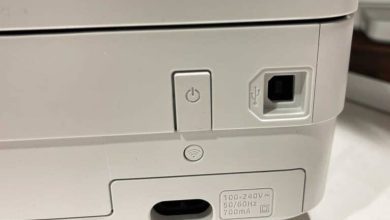
Before delving into the technical aspects, make sure your Canon printer is properly unboxed, set up, and plugged in. Inspect the printer for any shipping materials, and ensure that it’s placed within the WiFi range in your home or office. Double-check for paper jams and load the printer with the appropriate paper and ink or toner cartridges.
Step 2: Accessing Printer Settings
Turn on your Canon printer and access the menu or settings screen. The method to access settings can vary based on your printer model, but there’s usually a dedicated “Menu” or “Settings” button on the printer’s control panel.
Step 3: Navigating to WiFi Settings
Within the printer settings, navigate to the network or WiFi setup options. Look for a menu item labeled “WiFi Setup,” “Network Settings,” or something similar, depending on your printer model.
Step 4: Selecting Your WiFi Network
Your printer will scan for available WiFi networks. From the list displayed on the screen, select your WiFi network. If your network isn’t visible, ensure that your printer is within range and that your WiFi is functioning correctly.
Step 5: Entering the WiFi Password
After selecting your WiFi network, you’ll be prompted to enter the WiFi password. Using the printer’s control panel, carefully input the password. Remember, WiFi passwords are case-sensitive, so accuracy is crucial.
Step 6: Confirming the Connection
Once you enter the password, your Canon printer will attempt to establish a connection with the WiFi network. This process might take a few moments. Once the connection is successful, your printer will display a confirmation message on the screen.
Step 7: Installing Printer Drivers on Your Devices
While your printer is now connected to WiFi, your computer, laptop, or mobile devices still need the necessary drivers to communicate with the printer wirelessly. Most modern operating systems automatically detect the printer, but it’s advisable to visit the official Canon website to download and install the latest drivers specific to your printer model.
Step 8: Testing the Wireless Connection
To ensure a successful setup, open a document or an image on your computer or smartphone. Select the print option, and your Canon printer should appear in the list of available printers. Choose your printer and initiate the printing process. If everything is set up correctly, your printer will receive the print job and produce the document or image without any hassle.
Troubleshooting Tips
- Check WiFi Connection: Verify that your WiFi network is stable and functioning correctly. If other devices are connected without issues, the problem might lie with the printer.
- Restart Devices: Sometimes, a simple restart of your printer, computer, and router can resolve connectivity problems.
- Update Firmware: Ensure your Canon printer has the latest firmware updates. Firmware updates can fix bugs and improve overall performance.
- Firewall Settings: Adjust your firewall settings if your printer isn’t being detected. Sometimes, firewalls can block the communication between the printer and your devices.
- Contact Customer Support: If all else fails, don’t hesitate to contact Canon’s customer support. They have knowledgeable professionals ready to assist you in resolving any issues you might face.
Mastering the Art of Wireless Printing: Connecting My Canon Printer Wirelessly
In today’s digital age, the convenience of wireless connectivity has transformed the way we interact with our devices. When it comes to printers, the ability to connect wirelessly is a game-changer, offering flexibility and ease of use. Canon, a leading name in the realm of printing technology, has made connecting their printers wirelessly a seamless process. In this comprehensive guide, we will explore the step-by-step process of connecting your Canon printer to your network, allowing you to print effortlessly from any device in your home or office.
Understanding the Basics
Before diving into the technical details, it’s essential to understand the fundamentals of wireless printing. Unlike traditional wired connections, wireless printing allows you to print documents and images from your computer, smartphone, or tablet without the need for physical cables. Instead, your devices communicate with the printer over a shared network, granting you the freedom to print from any room within the network’s range.
Step 1: Preparing Your Printer
The first step towards wireless printing begins with the proper setup of your Canon printer. Unbox the printer carefully, following the manufacturer’s instructions. Ensure that all protective materials are removed, and the printer is placed within the range of your WiFi network. Proper placement is crucial for a stable and reliable wireless connection.
Step 2: Accessing Printer Settings
Power on your Canon printer and access the settings menu. The method to access settings may vary depending on your printer model. Look for a button labeled “Menu” or “Settings” on the printer’s control panel. Press the button to enter the settings menu.
Step 3: Configuring WiFi Settings
Within the settings menu, navigate to the wireless or network settings. En özel ve reel kızlar Halkalı Eve Gelen Escort Seyhan | İstanbul Escort Bayan sizleri bu platformda bekliyor. Look for an option named “WiFi Setup” or “Network Settings.” Select this option to initiate the wireless configuration process.
Step 4: Selecting Your WiFi Network
Your Canon printer will scan for available WiFi networks. From the list displayed on the screen, select your WiFi network. If your network is not visible, ensure that the printer is within range and that your WiFi is functioning correctly.
Step 5: Entering WiFi Credentials
Once you’ve selected your WiFi network, the printer will prompt you to enter the WiFi password. Use the printer’s control panel to input the password accurately. Double-check the characters to avoid any errors, as WiFi passwords are case-sensitive.
Step 6: Verifying the Connection
After entering the WiFi password, your Canon printer will attempt to establish a connection with the network. This process might take a few moments. Once the connection is successful, the printer will display a confirmation message, indicating that it is now connected to the WiFi network.
Step 7: Installing Printer Drivers
While your printer is now wirelessly connected to the network, your devices such as computers, laptops, or smartphones require the necessary drivers to communicate with the printer. Visit the official Canon website to download and install the latest printer drivers compatible with your operating system. These drivers enable seamless communication between your devices and the printer.
Step 8: Testing the Wireless Connection
To ensure that you have set up your Canon printer correctly, open a document or image on your computer or smartphone. Select the print option and choose your Canon printer from the list of available printers. Initiate the printing process, and if you have configured everything correctly, the printer will receive the print job and produce the document or image wirelessly.
Troubleshooting and Tips
- Check Network Stability: Ensure that your WiFi network is stable and functioning correctly. Connectivity issues often stem from network problems.
- Restart Devices: Sometimes, simply restarting your printer, computer, and router can resolve connectivity issues by establishing a fresh connection.
- Firmware Updates: Regularly check for firmware updates for your Canon printer. Updating the firmware can resolve bugs and improve the printer’s overall performance.
- Firewall Settings: Adjust your firewall settings to allow communication between your devices and the printer. Firewalls can sometimes block the connection.
- Professional Assistance: If you encounter persistent issues, don’t hesitate to seek help from Canon’s customer support. Their experts can guide you through advanced troubleshooting steps.
Conclusion
Connecting your Canon printer to WiFi might seem like a daunting task, but with the right guidance, it becomes a straightforward and rewarding experience. Wireless printing offers unparalleled convenience, allowing you to print from any device in your home or office without the constraints of cables. By following the steps outlined in this guide and being patient and meticulous, you’ll soon be enjoying the freedom and flexibility of wireless printing, unlocking the full potential of your Canon printer. So, go ahead, liberate your printing experience, and embrace the future of effortless, wireless printing!