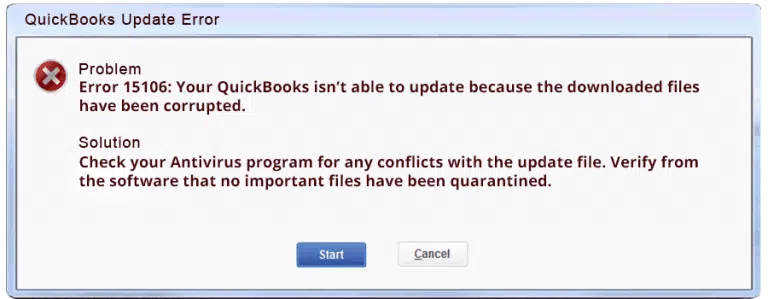
The accounting program QuickBooks is a boom in the industry of businesses but has come up with various glitches. Although the program has numerous advantages to make the working process more accessible, it has multiple error codes that sometimes interrupt businesses’ important work.

This blog will discuss one of these kinds of QuickBooks Error 15106, the causes and symptoms of this error, and how to resolve it. This error generally triggers while updating this software to the new version and indicates damage in the update program. QuickBooks error 15106 is an error of payroll update and can cause issues in the long term.
Why Does the QuickBooks Error 15106 Trigger?
- The QuickBooks installer may be flagged as a potential danger by the Web Root antivirus program, which inhibits its Windows operations.
- Only some of the extra parts that will later be necessary for updating the payroll and application are installed when installing QuickBooks.
- If the user does not have Windows administration rights, then Error 15106 can trigger.
- Very high-level settings in User account control can interfere with the updates of QuickBooks.
- Antimalware or third-party antivirus programs can interrupt the update process of QuickBooks.
Resolving the QuickBooks Error 15106
Solution 1: Disabling User Account Control
- Press the keys “WIndows+R” to launch the Run Box.
- Enter “Control Panel” & click on OK.
- Choose your User Account
- Select the settings option “Change User Account Control.”
A significant point that users must understand in this is that if they face any UAC prompt, they must select the option “Yes.”
- If the user wishes to turn off the UAC, select “Never Notify” & click on OK or else select “Always Notify.”
- Lastly, restart your computer and verify if error 15106 is resolved.
Solution 2: Log in using administrative credentials
It consists of 2 steps
1. If the user has signed in being some other user, then follow the below-mentioned steps:
- Head towards the QuickBooks software icon
- Choose the option “Run as administrator” by right-clicking on the icon.
- Enter the credentials of an Administrator and click on “OK.”
- Now, you can work being an admin.
2. The user can sign in as an administrator through account switching:
- First, go to the start menu and select the option “Switch User.”
- Next, enter the credentials of an Administrator and click on “OK.”
- By this, the user can switch to an administrator account from a user account.
Solution 3: Renaming the folder after deleting the antivirus software
- Press the keys “Ctrl+Shift+Esc” to launch the Task Manager.
- Then head to the tab “Processes” and search for the existing antivirus inside the system.
- Choose the option “End process.”
Renaming QuickBooks update folder
- Press the keys “Windows+E” to launch the file explorer.
- Then head to the folder “QuickBooks installation”
- Generally, the installation is done in the folder “C:\Program Files\Intuit\QuickBooks(year)\Components folder.”
- Choose to rename the file by right-clicking on the folder downloadqb19 or downloadqb20.
- In the last of the folder’s name, enter “OLD” & try re-updating the QuickBooks.
Solution 4: QuickBooks Clean Install in a selective mode of startup
1. Making the data backup ready
- In the first step, the user needs to take a company files backup and a QuickBooks software copy.
2. Sing-in into the computer in the mode of Selective startup.
- Press the keys “Windows+R” to launch the run box, enter “msconfig,” & press” OK.”
- Head to the tab “General,” select the option “selective startup mode,” & then choose “Load system services.”
- Then head to the “Services ” tab and choose the option “hide Microsoft services.”

- Tick the check box “Hide Microsoft services” & choose “disable all options.”
- Also, do not forget to tick the check box “Check window installer.”
- Lastly, choose the option “Restart.”
3. Uninstall & Re-install the QuickBooks software
- After following the above steps, when the system restarts, the user must launch the QuickBooks software, uninstall it, and install it from the safe or Intuit website.
4. Lastly, turn into the normal mode of a startup.
- Initially, launch the “Run window,” enter “Misconfigure,” and click on “OK.”
- Select the option “Normal startup” & select OK from the tab “General.”
- Lastly, from the window “System Configuration,” choose to restart it.
CONCLUSION
The blog has covered almost all the possible steps to fix Error Code 15106 in QuickBooks. By following the steps till the end, it is ensured that Error Code 15106 will be resolved. However, suppose any user still faces the same Error Code 15106 even after performing all the solutions provided. In that case, it is suggested to contact the QuickBooks error support team 1-800-615-2347 of QuickBooks software for further guidance.


