If you’re thinking of installing a Level 2 electric vehicle charger in your own home, then you should definitely read this article on how to avoid common pitfalls with Level 2 charger installation. Although it might seem complicated at first, once you’ve read through these tips, you’ll find that it’s actually quite simple and takes less time than you probably thought! So without further ado, here are the top 7 tips to make Level 2 EV charger installation a breeze. The first tip… etc.
1) Do your research
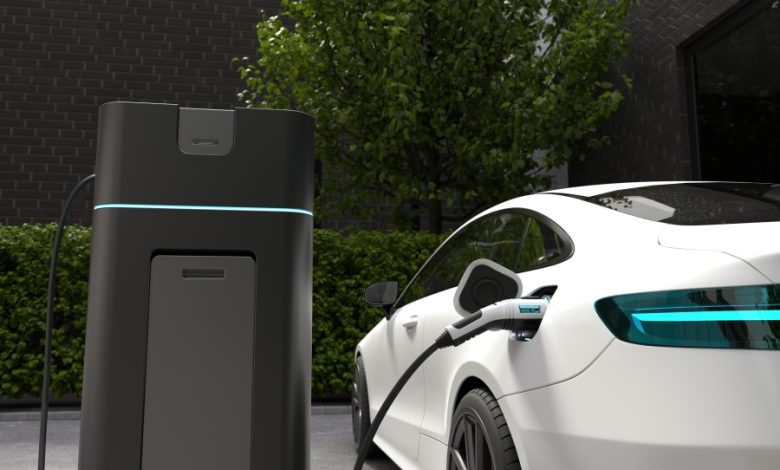
There are many benefits of owning an electric vehicle. The most obvious is the potential for savings on fuel costs, but there are other benefits that aren’t so obvious. One of these benefits is the opportunity to purchase and install a level two EV charger at your home. To help you make the most informed decision possible, we have compiled seven tips from professionals in the field that will keep you from making mistakes with level two EV charger installation:
1) Get an electrician involved early in the process – An electrician can provide valuable advice about what kind of equipment you need for your electrical system and how it should be installed.
2) Hire a professional
Installing your own level 2 charger may seem like a good idea, but the risks may outweigh any benefits. If you don’t have experience with electrical installations and working with power lines, hiring an electrician is the best way to go. This will ensure that your charger is installed properly and up to code. Plus, they can offer installation assistance at the same time–saving you time and money in the long run.
* Use caution when it comes to extension cords –
You should never use an extension cord as your sole power source for an installation; if possible, install a new circuit breaker for your charger on its own dedicated line.
3) Get the right permits
Before you install an electric vehicle (EV) charger, make sure that you have all of the permits required by your city or state. If you are installing the charger in your home, then obtaining the proper permits is likely not a problem. However, if you want to install it at work or in public space (e.g., parking lot), then there are likely some additional requirements. In addition to getting all necessary permits, there are other considerations for installation depending on where the charger will be installed and how it will be used.
Before you begin installing an electric vehicle charger, make sure you’re aware of all of your local and state requirements for charging in public areas. In some cases, there may be limits on how many chargers can be installed or who can install them. If you want to sell power from your home installation, then there are additional rules that apply. It’s important to get these issues settled before going forward with installation so that you don’t have any surprises down the road.
4) Choose the right location
When installing a level 2 EV charger in your home, it’s important to know the range of your vehicle. Some cars can only go 25 miles on one charge, while others can go up to 100 miles. If you’re not sure what kind of vehicle you have, consult with your car dealer or research online before you purchase an electric car charger. After choosing the location for your electric car charger, call an electrician and have them wire your garage for 220 volts (most homes are wired for 120 volts). Next, locate where the breaker box is and switch off power from there (or notify the power company if it’s not possible) so that no one gets electrocuted during installation.
In choosing where to install your electric car charger, make sure it is within range of your vehicle. Some vehicles can only go 25 miles on one charge, while others can go up to 100 miles. You’ll also want to think about how many appliances you have that draw from that same plug (other than an electric car charger). It may be worth having another outlet installed in your garage for convenience or safety reasons if you have too many things drawing from one power source. If your home doesn’t already have an existing 220-volt outlet, consider using an electrician instead of an amateur; it’s easy to make mistakes when installing electrical wiring.
5) Install the charger properly
Install the charger in an area that is clean, dry, and well ventilated. This can be indoors or outdoors. If the charger will be installed outdoors, make sure it is protected from precipitation, dust, dirt and debris. The surface needs to be level and able to support the weight of the unit with at least 10 inches of clearance on all sides. Installers should use caution when installing chargers in areas with high ambient temperatures as this can affect performance adversely. All electrical connections must comply with local codes and all underground wiring must comply with local code requirements for conduit and burial depths.
Installers should also check that no equipment such as gas meters, valves or water lines are located nearby before installation begins.
6) Test the charger
- Test the charger on the ground before installation by plugging it in. For best results, use an extension cord with a long enough cord to reach any desired location. This will give you the opportunity to test that there are no frays or breaks in the cord and that it is grounded correctly.
- Consider your driving habits when deciding where to install your charger so that you can take advantage of off-peak hours and avoid high rates during peak hours (usually weekday afternoons). If you are only commuting short distances, consider installing the charger at your home as this will allow for nightly charging and quick top-ups on weekends.
7) Maintenance
Maintenance is essential in order to ensure that your charger is functioning and safe. Use these tips as a guideline for upkeep on your new charger:
– Schedule routine maintenance checks with qualified professionals who can do the work efficiently and affordably.
– Keep an eye out for any warning signs such as arcing, sparking, or smoke coming from the unit.
– If you have an outdoor installation, keep water away from the unit by checking weather conditions and avoiding watering near it. Check for any leaks or puddles around the base of the unit that may indicate corrosion issues.
– Clean your charger monthly with soapy water and dry completely after cleaning to avoid corrosion from developing.